Getting Started
This guide will walk you through the essential steps to start monitoring your first SQL Server instance with QMonitor.
Before You Begin
What you’ll need:
- A SQL Server instance you want to monitor (SQL Server 2008 or later)
- Access to create a login on the SQL Server instance
- A modern web browser
Time to complete: About 15 minutes
Step 1: Create Your Account
First, you need to register for a QMonitor account:
- Go to https://portal.qmonitor.app/Identity/Account/Register
- Enter your email and create a password (minimum 20 characters)
- Complete the captcha verification
- Check your email for the confirmation link
Once you verify your email, you can log in to QMonitor.

Need more details? See the Sign Up guide for step-by-step instructions with screenshots.
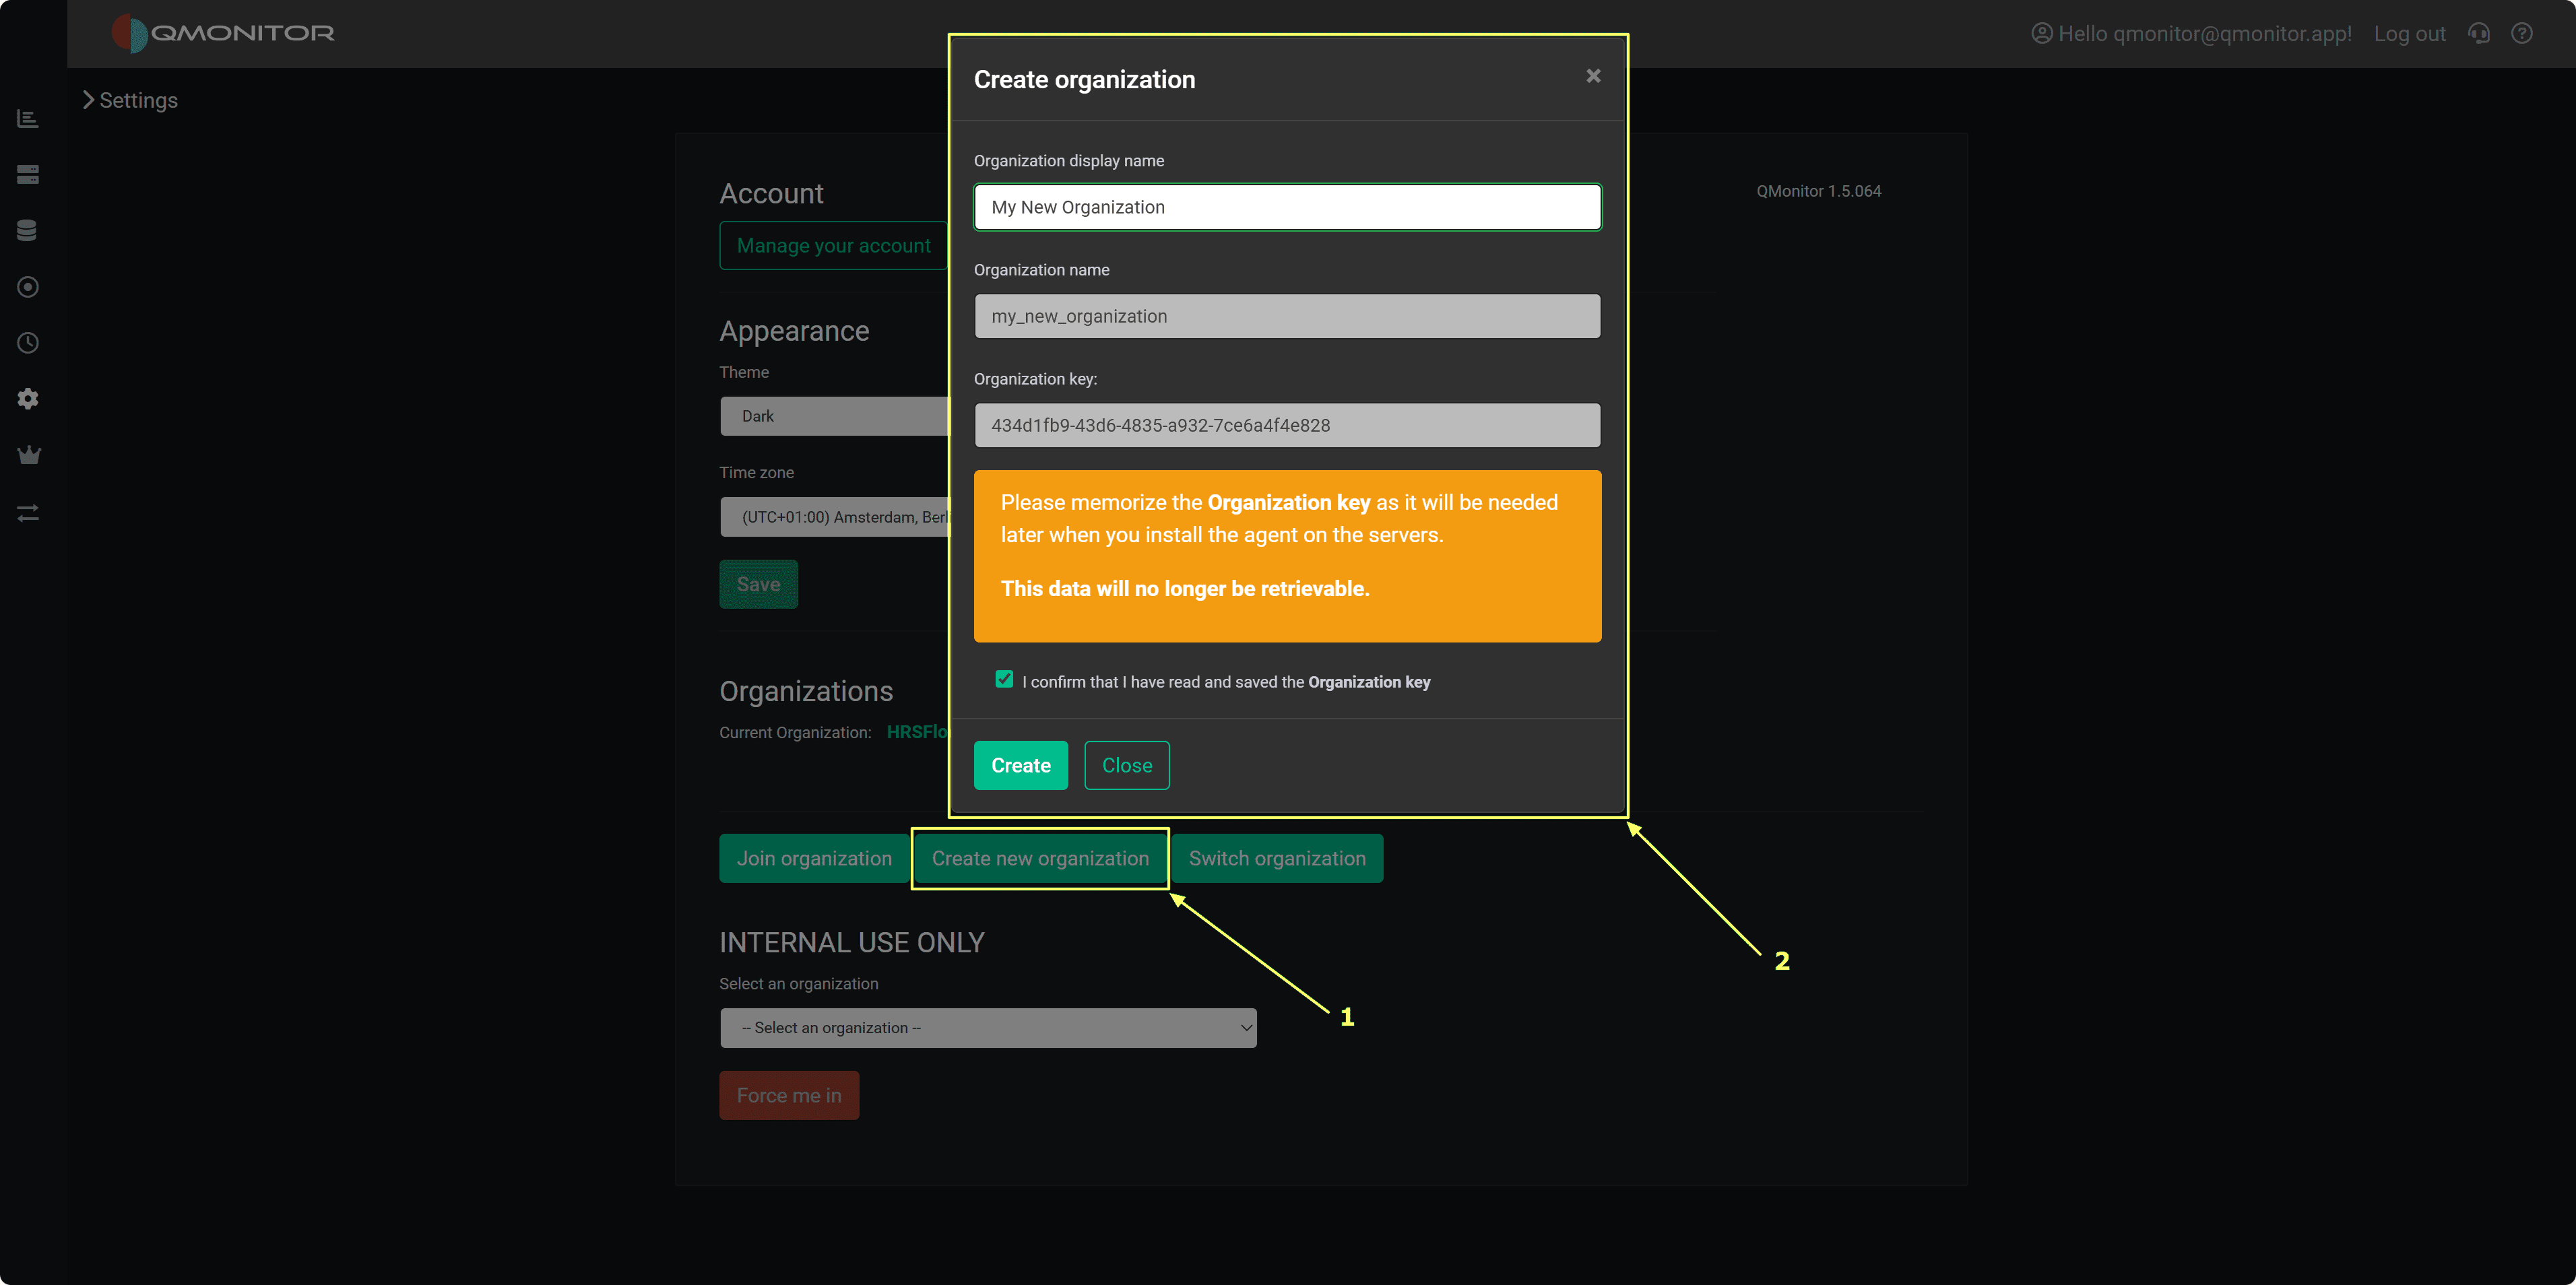
Step 2: Set Up Your Organization
After your first login, QMonitor will guide you through creating your organization:
- Enter your organization name
- Note down your organization name and ID (you’ll need these for agent configuration)
- Configure basic settings
- Invite team members (optional)
Your organization is the workspace where all your monitored instances and team members will be organized.
Need help? Check out Set Up Organization for detailed instructions.
Step 3: Install the QMonitor Agent
The QMonitor agent collects metrics from your SQL Server instances and sends them to the QMonitor platform:
- Download the agent installer from the Downloads page
- Run the installer on a server with access to your SQL Server instances
- Configure the agent with your organization’’s connection details
- Start the agent service
The agent will start and display as “ok” on the Instances page.
Agent deployment options: You can install the agent on the same server as SQL Server or on a separate monitoring server. See the Agent documentation for installation options.
Step 4: Prepare Your SQL Server Instance
Before adding an instance to QMonitor, you need to configure it with the required permissions:
- Download the setup script from the Instances page in QMonitor
- Open the script in SQL Server Management Studio
- Configure these parameters at the top of the script:
- @LoginName: The login name for the QMonitor agent
- @Password: Password for SQL Server authentication (leave empty for Windows authentication)
- @Sysadmin: Set to ‘‘Y’’ for full access, or ‘‘N’’ for minimum required permissions
- Execute the script on your SQL Server instance
The script will:
- Create the QMonitor login (if it doesn’’t exist)
- Grant necessary permissions
- Create the Extended Events session for monitoring
- Set up required database objects
What permissions does QMonitor need? The setup script can grant either sysadmin role membership (easiest) or minimum required permissions for specific DMVs and system tables. See Set Up Instance for details.
Step 5: Add Your Instance to QMonitor
Now you’’re ready to register your SQL Server instance:
- In QMonitor, navigate to Instances
- Click New Instance
- Enter the connection details:
- Instance name or address
- Authentication method (Windows or SQL Server)
- Login credentials (the ones you configured in Step 3)
- Click Save to verify
QMonitor will verify that all permissions are correctly configured before completing the registration.

Troubleshooting connection issues? See Register Instance for common problems and solutions.
Step 6: View Your First Metrics
After a few minutes, you’’ll start seeing data in your dashboards:
- Navigate to the Dashboard page
- Select your instance from the dropdown
- Explore the available metrics:
- CPU and memory usage
- Wait statistics
- Query performance
- Blocking and deadlocks
- SQL Server Agent jobs

What’’s Next?
Now that you have your first instance monitored, you can:
- Set up alerts: Get notified when problems occur
- Monitor more instances: Add additional SQL Server instances
- Invite team members: Share access with your team
- Explore dashboards: Dive deeper into performance metrics
- Review concepts: Learn more about how QMonitor works
Need Help?
If you run into any issues:
- Check the Core Tasks for detailed guides
- Review the Concepts page to understand key terms
- Contact support through the QMonitor portal